ERP DFW Guidance
ChangelogSubmit Feedback/Bug
  • 👋Welcome ERP DFW Guidance
  • 🚀Getting Started
    • System Overview
    • Setup Workspace
    • Update Personal Information
    • Setup Table Preview
  • 📂Master Data
    • Overview
    • User & Employee
    • Item Management
    • Office/Branch
    • Chart of Account (CoA)
    • Cost Center
  • ⚙️Initial Project Setup
    • Overview
    • Setup by Finance/Administration
    • Setup by Project Coordinator
  • 💳Procurement / Purchasing
    • Overview
    • Procurement - Direct to Vendor
    • Procurement - Cash Advance
    • Procurement - Reimbursement
  • ✈️Travel Process
    • Overview
    • Travel - Cash Advance / Direct to Vendor
    • Travel - Reimbursement
  • 👥Human Resources (HR)
    • Timesheet (TS)
Powered by GitBook
On this page
  • Finance & Administration
  • User & Employee
  • Setup Workspace Access
  1. Initial Project Setup

Setup by Finance/Administration

Last updated 1 year ago

Note: Only Administrator User can do this guide


Finance & Administration

Step 1: Prepare Project/Program Information Database

  1. Prepare DFW Program/Project Database in this Sheet File.

  2. Continue the Program/Project Number from the latest Program/Project List

  1. Create a new column in Table 2. PROGRAM ACCOUNT (Example code UA)

  2. Create a new number by continuing the latest number based on the previous project

  1. Create Expense Account by Project Budget Category, and the number should be standard like other existing project

  1. Create a Cost Center Number by fill the Cost Center Category, project number, and project ID


Step 2: Add Project Account form Sheet File to Chart of Account

  1. Add the Project Account to the ERP System (see this guide for details)

  1. Add Project Expenses Account Parent

  1. Add "Biaya Program" Expenses Account as Child


Step 3: Add Cost Center Account form Sheet File to Cost Center Tree

  1. Add the Cost Center to the ERP System (see this guide for details)

  2. Fill Data -> Create New


Step 4: Create Project Mode of Payment

  1. Open Finance Administration Workspace Select Mode of Payment Doctype, or find it with Search Bar

  1. Duplicate Exisiting Project Mode of Payment

  1. Fill Name Made of Payment, add Bank Account Reference -> Save


Step 5: Create New Admin/Bank Charge

  1. Open Finance Administration Workspace Select Purchase Taxes and Charges Template Doctype, or find it with Search Bar

  1. Duplicate Exisiting Project Admin/Bank Charge

  1. Fill Name of Admin/Bank Charge, add Account Head Reference -> Save


Step 6: Create New Project

  1. Open Program Workspace Select Project Doctype, or find it with Search Bar

  2. Select +Add Project

  1. Fill Project Data based on Sheet File -> Save


Step 7: Add Customer (Donor)

  1. Open Selected Project, In Customer field

  2. Select Customer if already added, if Customer is new select + Create a new Customer

  1. Fill Donor Information -> Save

Step 8: Add Sales Order

  1. Open Selected Project, In Sales Order field

  2. Select + Create a new Sales Order

  3. Fill Project Information in Sales Order

  4. Add item "GR01: Project Grants" and Rate as total Project Amount

  5. Save -> Submit

User & Employee

Note: Only Administrator User can do this guide

Step 9: Assign User to Project

  1. Open Selected Project, In Connection select User Permission +

  2. Select + User Permission

  1. Fill User that will add the Project Permission, Allow = Project, For Value = Selected Project -> Save


Setup Workspace Access

Note: Only Administrator User can do this guide

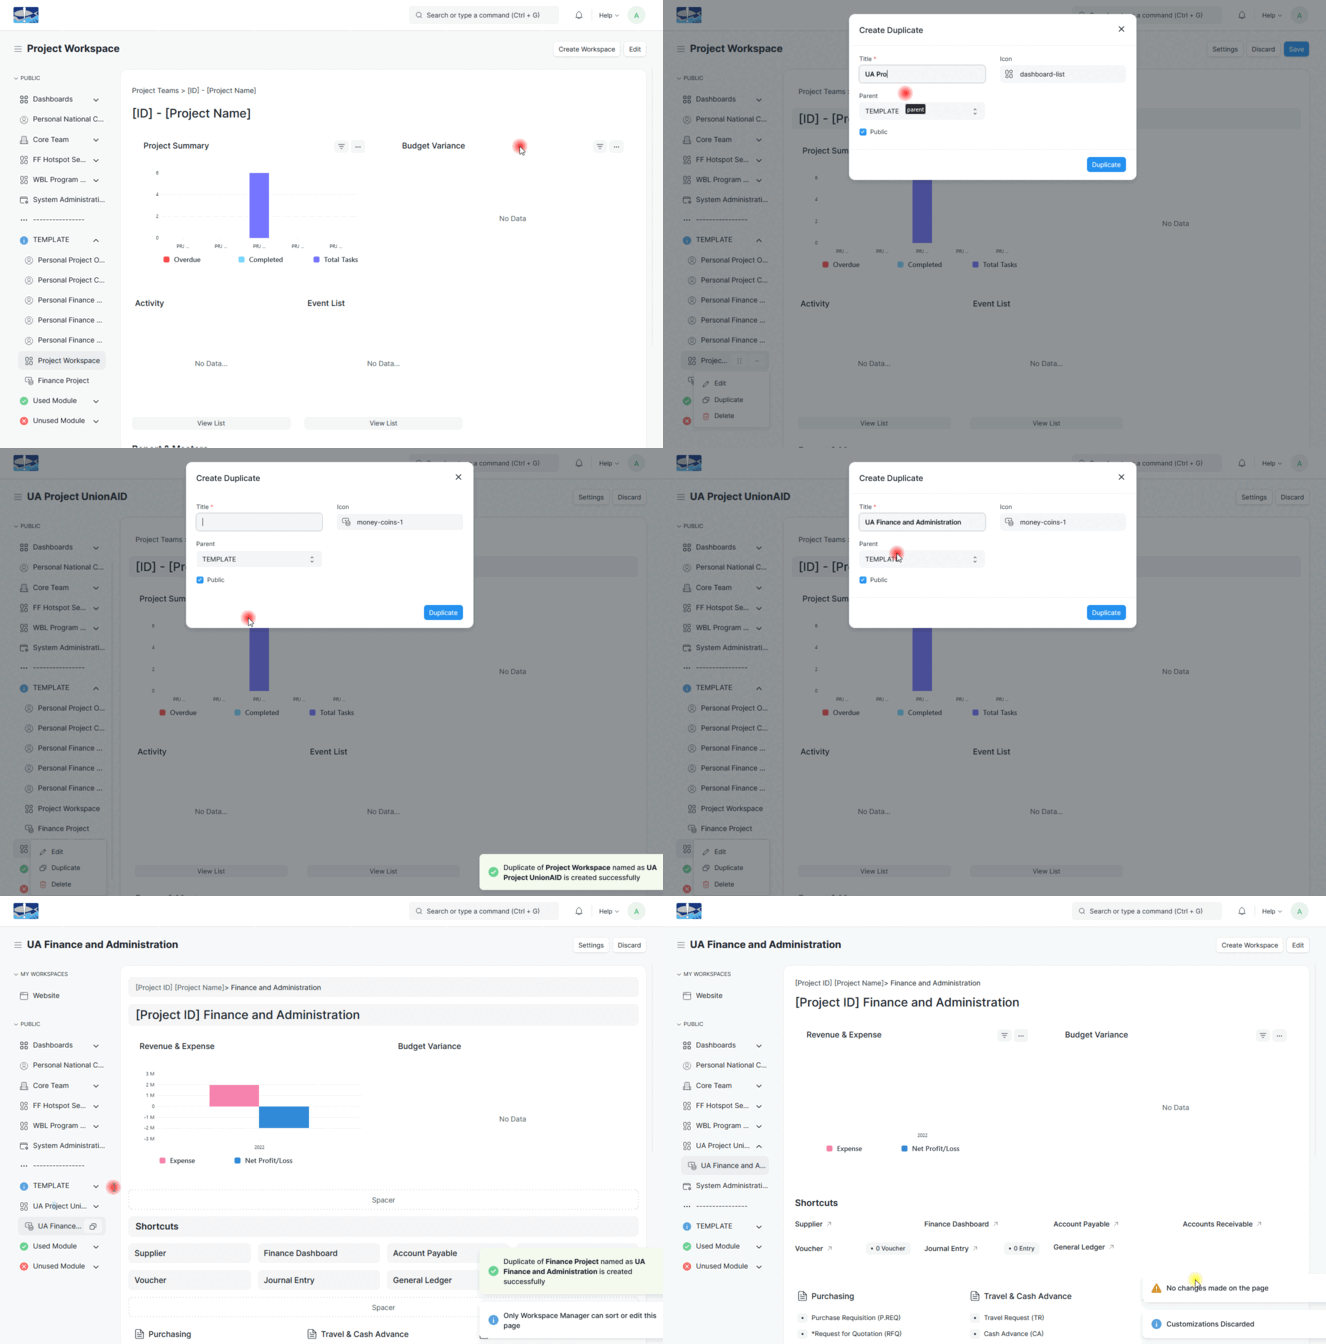
Step 10: Create Project Workspace

  1. Edit Worskpace > Duplicate Template Project Workspace

  2. Duplicate Template Finance and Administration set Parent Project Workspace that added before

  1. Update Workspace Area Name

  2. Update Quick List Filter (Voucher and Journal Entry)


Step 11: Create Role add Add to Workspace
  1. Duplicate Existing Workspace Project Role

  2. Add Project ID in Workspace Name

  3. Set Roles In Workspace that created before -> Save


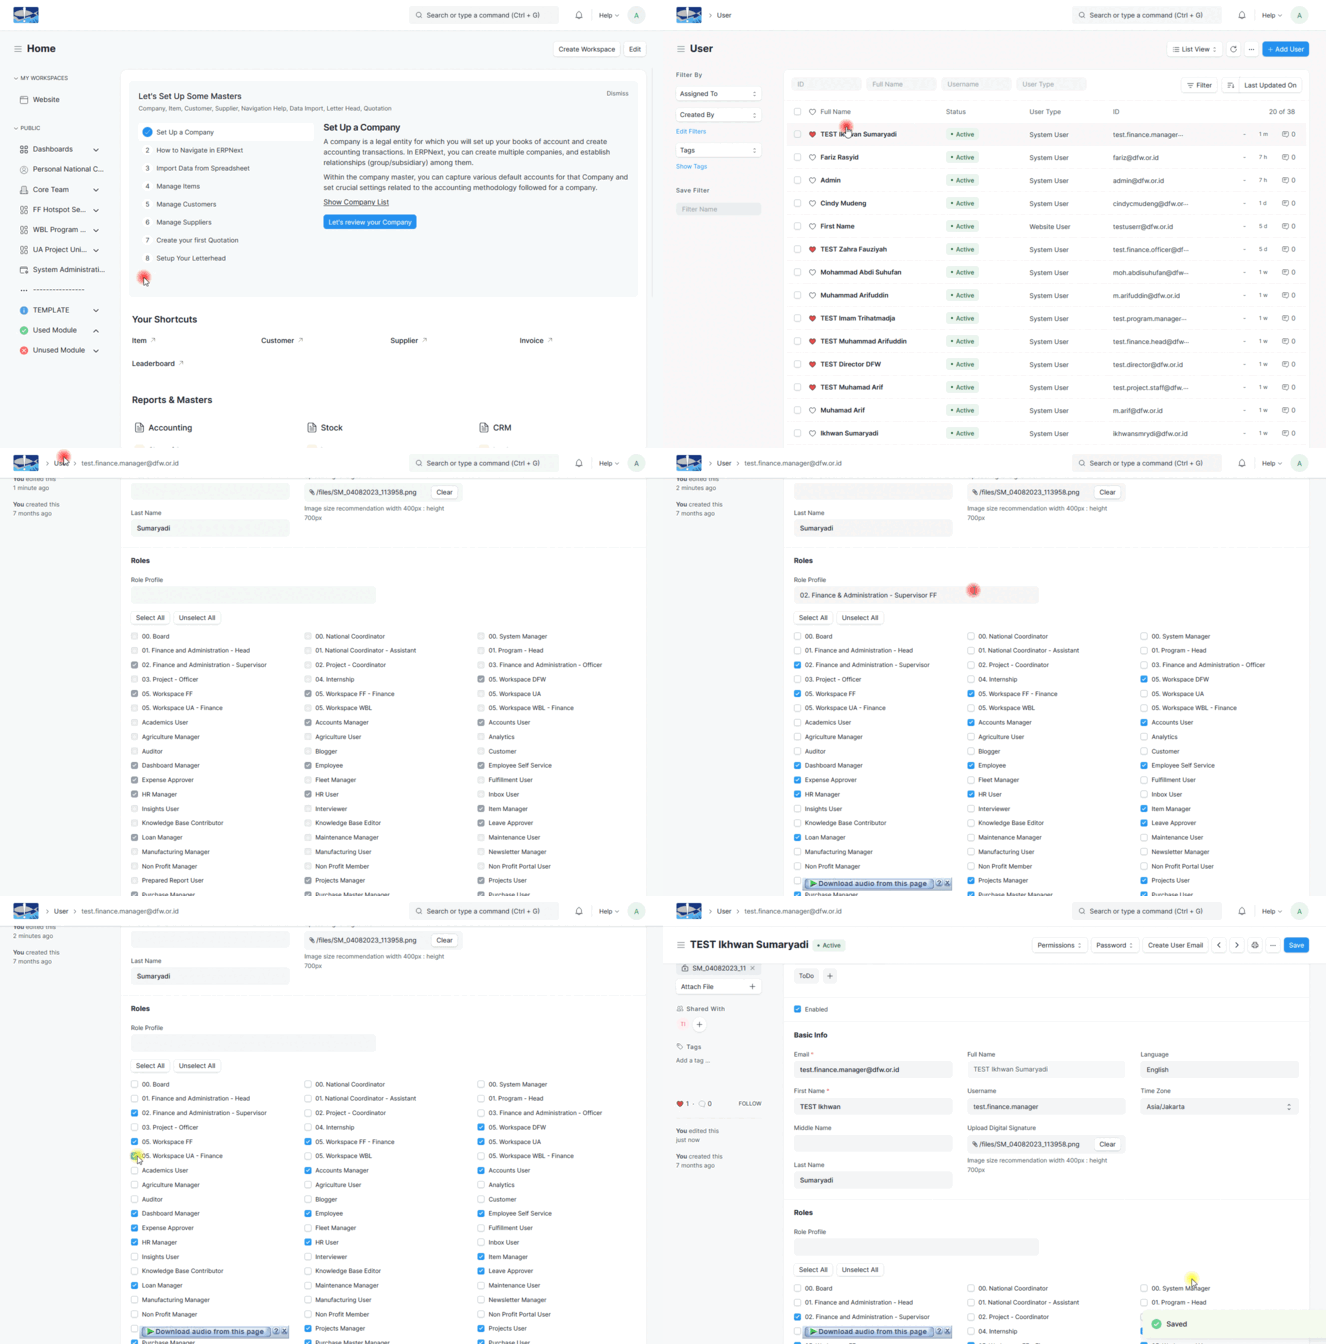
Step 12: Add Role to Selected User

  1. Open Selected User, in User Doctype

  2. Refresh Page, Remove Role profile

  3. Tick Workspace Role that want to give to the user > Save

⚙️